Tuesday, September 06, 2011

Beds

My next big project is to build 2 single beds. They are going to be guest beds that are multi-purpose:
  • Twin beds for 2 friends visiting
  • Pushed together for a couple visiting
  • Can be built into bunkbeds
I got the wood from a wholesale timber merchant place down by the harbour. You can only order massive slabs of wood, so I measured the size of our little VW Golf to see the maximum length of wood that would fit in it without any wood sticking out the boot. I needed to have planks that were 2m long as that's the length of the beds and the Golf can fit 214cm! I placed my order and drove down. They practically laughed me out of there saying along the lines of "oh little girl, you do realise what size wood you've ordered? "This" is the car you've come to pick it up in?! No way will that wood fit in there!". I told them to hang on and that it just needed a bit of rearranging - by putting the back seats down and the front passenger seat pushed forward, they fitted in like a jigsaw! What do you think?!


I designed the beds using SketchUp and also used it to find the best way of cutting the wood with the least bits of wood wasted.


I am making the beds at the wood workshop as I didn't feel confident doing them all on my own. I gave my measurements to the carpenter who helps out there and he cut all the wood to size on the big scary open table saw.


So far all I have done is glued the leg pieces together so they will be sturdy like posts.


The wood workshop is closed for the summer holidays until next week anyway so I won't get going again until then.

Shoe Rack

Here's the shoe rack I built as my first wood project! I designed it to fit exactly into the little niche in our hallway using a free designing tool SketchUp.
It's really easy to use and gives you a great idea of whether something will work or not.

I built the shoe rack at a woodwork shop in town. It's a great idea - it's basically a centre which offers loads of activities you can do where there is someone on hand to show you what to do and then you get on with your project. You pay a couple of Euros for the evening and can then use all the tools etc.
Here it is drying clamped together in the woodshop!

I made this project with cheapo spruce wood and a biscuit joining method. It's so sturdy! We sit on it all the time to put our shoes on.
I painted it white with the shelf bottoms in the same blue as the dandelions on the wall so that a) you can't see grubby shoe marks and b) it fits in with the blue and white hallway theme. I'm sure it would cost loads to have a carpenter make a custom rack!

Monday, September 05, 2011

Bedside Tables

Here they are ... my little gems are finished!
Am really happy with how they turned out.


I used SketchUp to design them.


I used pocket hole screws and just the cheapest spruce wood as I knew I was going to paint the bedside tables when they were finished.


Hopefully I didn't annoy the neighbours sawing with my brand new circular saw! I shut myself in the cellar and G got to play a bit more Fifa on the Playstation than normal! I love having a house! Could never have got to have a hobby like this in the flat where we used to live with Pat Butcher in the flat below!

I painted them white and then used a chestnut brown woodstain for the knob and surfaces. I then varnished the whole thing to give it a protective coating.

Look - drawers that open and close and everything!

Clock

I ordered some clock hands off Amazon and printed out a sample of fonts for G to choose...
what do you think? Good choice?


I am definitely the creative one out of us and he has the mathematician's brain, so worked out where the numbers should go on the wall and I painted them on - what a team!
It's just behind the sofa in the living room and grabs your attention as soon as you walk in the room - I love it!

Dandelions Key Hooks

I drew a sketch of what I wanted and then free-handed it onto the wall in pencil.


I then painted over the pencil marks in a blue paint with a thin paintbrush.


I drilled into the wall, put in rawlplugs and screwed hooks into the wall.


Our house keys, shed keys etc. hang here and I love that you can always tell whether the other person is home as soon as you're in the door!


They're just next to the door and are supposed to look like a gust of wind from opening the door has made the dandelion clocks (or what are the individual bits of the clocks called - hands?!) blow up the stairs.

I got the inspiration from a great website with loads of brilliant ideas - have a look here!

Friday, September 02, 2011

Then and Now!

So, here’s a little preview of how things looked before we moved in and what the house looks like now
(Click on the photos to enlarge them):

Top Floor

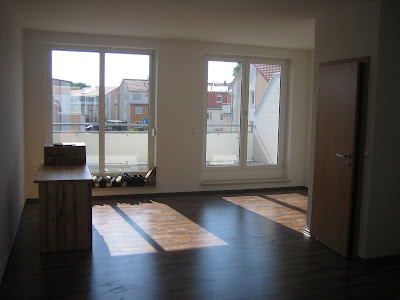
This is the top floor which will be our main bedroom. It’s got a balcony and an ensuite. At the moment we're in the middle of the moving process. We’re having a walk-in wardrobe type thing and, once the blinds are up, we’ll move up here!


Bedroom

This is where we’re sleeping at the moment. When we move upstairs, this will become the guest room.

That’s my attempt at a scrabble piece cushion, in case you’re wondering what on earth G2 means!
Bathroom

The bathroom is finished. It needs towel rails and then it’s done.


Living Room

Some silly shots of me. I think this was when I was worried that the living room might be too small! It’s so hard to picture something when it’s all just concrete!
We basically recreated how things were in the old flat.
Do you like the flowers on the table trying to make it look like a magazine shot?!


Kitchen

Our kitchen when the builders were using it as their smoking den!
We’re finished with the kitchen. Just need splashbacks and some sort of tea towel hooks or something.
Garden

Our little patch of grass! It was full of weeds and cat poo when we moved in! We’re slowly putting down new grass seed and have a little bed of herbs but haven’t really done much to it yet.


Thursday, September 01, 2011

Welcome One and All!

Hello and welcome to my blog!
This is basically going to be a blog all about our new house and all DIY projects we will be doing along the way before we can say "done"!